|
Ascendo DataVault - BlackBerry Password Manager, Version 4, User Guide
Chapter
7.0 - Other Features
7.1 Category and Type
Management
You can Add, Edit or Delete Categories and
Types. On your BlackBerry, choose "View/Manage Categories" or "View/Manage Types"
from the screen menu. On your Desktop you can use the top row buttons or
right-click on a branch and choose from the context menu.
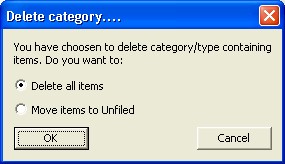
When you delete a Category or Type in DataVault
Desktop, you will have two options, see Figure 29.
Figure
29
The default option, "Delete all
items" will delete the items contained in the Category or Type permanently.
You can also choose to Move the items to the Unfiled Category/Type.
You can use drag & drop to move a Type from
one Category to another.
When you start DataVault for the first time,
you will see sample Categories and Types including "Unfiled".
Categories and Types default to Unfiled when adding an Item. The Unfiled
Category and Type cannot be deleted.
7.2
Filtering Items
You can filter the Items displayed on the List
View screen. On both your BlackBerry and your Desktop you will see drop down
lists for Category and Type. If you select a choice from these lists the Items
that are displayed will be reduced.
To select a Category or Type on your
BlackBerry, use the track wheel/ball to move to the current value for the field
to highlight it. Click on the space bar to cycle through the choices or click on
the track wheel/ball again and select "Change Option".
To select a Category or Type on your Desktop,
click on the down arrow next to the field value. A drop down list will appear
from which you can make a selection.
7.3 Managing Templates
DataVault contains 20 pre-defined Templates, see
Figure 30. You can add, edit or delete Templates on you BlackBerry and your
Desktop. Any modifications can be synchronized between your BlackBerry and your
Desktop.
Figure
30
To manage Templates on your BlackBerry, select
"View/Manage Templates" from the List View or Tree View screen menu.
To manage Templates on your Desktop, click on
the Templates from the row of buttons at the top of the screen.
7.4 Password Generator
If you select the Password Generator option
from the BlackBerry Edit Screen menu, DataVault will automatically generate a random password
based on your presets, see Figure 31.
Figure
31
If you choose Copy & Close, the password
will be copied to the clipboard and you will return to the Item Edit Screen.
Click on the track wheel again and select Paste to enter the password into the
current field.
By default, the Password Generator will create
passwords containing 8 letters. You can click on the check boxes to modify the
length of the password or to include numbers and punctuation marks.
Click on the Regenerate menu option to create a
new password.
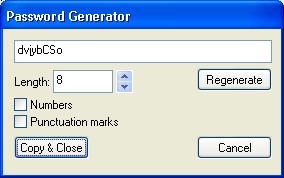
The DataVault Desktop tool bar includes a button to Generate
Passwords. When you click on the button a dialog window will appear with a
randomly generated password and several options, see Figure 32.
Figure
32
You can choose the length of passwords and whether
to include Numbers or Punctuation marks. If you change an option, click on the
Regenerate button to create a new password. If you click on the Copy & Close
button, the password will be copied to the Windows clipboard and is available to
paste into any Windows application.
7.5 Importing Items
Ascendo DataVault Desktop can import data
from numerous sources including:
-
Third party password
managers such as Cryptmagic, SplashID**, Illium eWallet, Code Wallet,
Flex Wallet, Handy Safe, Spb Wallet, Turbo Passwords, Minisafe,
Password Plus, etc.
-
Comma Separated Values
(*.CSV) files. Several third party password managers and productivity
applications like Excel can export data in this format.
-
RoboForm Passcards.
-
Saved Passwords from
Internet Explorer and Firefox.
-
DataVault Exchange files
(*.DVX).
-
BlackBerry Contacts.
-
BlackBerry Notes.
** When importing from a
SplashID vID file, you must first export the file from SplashID using a
blank password.
To import data into the
DataVault Desktop, select "Tools" from the top row menu options,
then "Import" to display a list of third party password managers
and a submenu for CSV options. If you select one of the third party
password managers, DataVault will prompt you to "Browse..." to
the appropriate directory and select a file with the file extension used
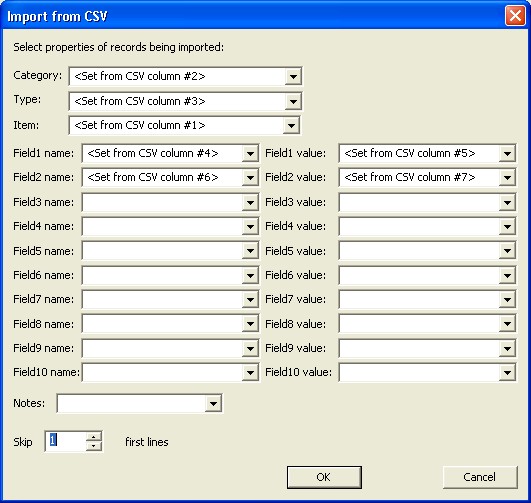
by that application. If you select
Tools > Import > CSV > Custom, DataVault will prompt to select a
CSV file then display the field mapping window in figure 33.
CSV files are text files
with commas separating fields and line breaks separating records. They can
be viewed with text editors like Notepad and imported or exported with
productivity tools like Microsoft Excel.
Not all third party
applications store fields in the same order. Some third party applications
may include field names (labels) such as "Username:",
"Password:", etc. in the exported file. Other may include only
the field values (contents). DataVault allows you to
map fields in a CSV file to the order in which they are stored in
DataVault, see figure 33.
For example, a CSV file
might contain a line of column headers and several items in rows, see
below.
Item,
Category, Type, Label1, Value1, Label2, Value2
Citi Bank Visa,
Personal, Credit Card, Number, 1111 2222 3333 4444, PIN, 2345
Wells
Fargo MasterCard,
Business, Credit Card, Number, 5555 6666 7777 8888, PIN, 0293
To import this file, you
would make selections from the drop-down lists as displayed in figure 33 and
set the "Skip first lines" parameter to 1. To download the CSV
file used in this example, click here. If
you assign fields incorrectly, you can delete all of the imported items by
selecting Tree View and deleting the Category or Type to which the
imported items have been assigned.
A more detailed example of
Custom Importing can be found in the Addendum.
Figure
33
To import from
RoboForm, save your RoboForm items in an .HTM file using the
"Print" menu and then import the file into DataVault using Tools
> Import > RoboForm menu.
Ascendo DataVault for BlackBerry
can import items from BlackBerry Notes and from BlackBerry Contacts.
To import an item from a
BlackBerry Note, select Import BlackBerry Memo from the List/Tree View screen
menu. You will be prompted to select the Category and Type in which to store the
item. DataVault will display the first BlackBerry note and give you options to
Import & Delete, Skip or Exit back to DataVault.
To import a BlackBerry contact,
open the BlackBerry Address Book, lookup a contact and select View from the
screen menu. Then click on the track ball/wheel to display the screen menu and
select Copy to DataVault.
7.6 Exporting Items
The DataVault Desktop can export
items in Comma Separated Values files (*.CSV) or in DataVault Exchange files (*.DVX).
CSV files are is a standard format used to exchange files between productivity
applications like Excel. DataVault Exchange files are password protected,
encrypted files that can be used to share items with other DataVault users.
When you choose Export from the
DataVault Tools menu, a window dialogue box will appear asking if you want to
export All Items, Current Item or Selected Items. Selecting All Items will
export the entire DataVault database. Selecting Current Item will export the
highlighted row in List View. To export Selected Items, you must first choose a
subset of items by holding down the Control Key (CTRL) and clicking on several
items.
DataVault for BlackBerry only
allows exporting items via email in DataVault Exchange Format. You can only send
one item at a time.
7.7 Printing Items
DataVault for Windows allow you to print one, some or all of the items in your database.
To print one item, go to list or tree view, click on the item to highlight, control-click to display the context menu, then select
Print Item.
To select several items for printing, hold down CTRL-ALT and select several items. Then right-click on any of the selected items
and select Print Items from the context menu.
To print all items, select File > Print from the text menu. DataVault requires that you re-enter your master password to protect your
data. Then select Print all items from the context menu.
|